How to Take Better Photos of Your Fresh Tattoos Using Just Your Phone

How to Take Better Photos of Your Fresh Tattoos Using Just Your Phone
You just finished an incredible session. Your artist wipes down the skin, the tattoo looks absolutely flawless, and you pull out your phone to take a picture. But somehow, the screen shows a glaring, red, washed-out version of the masterpiece on your arm.
Taking photos of fresh tattoos is notoriously difficult. The skin is inflamed, the area is shiny from the wipe-down, and phone cameras process images in frustrating ways.
Whether you're an artist trying to build a killer portfolio or a client wanting to show off your new ink, here is how to capture the tattoo exactly as it looks in real life—using just your phone.
1. Ditch the Overhead Fluorescents
The biggest enemy of a good tattoo photo is bad lighting. Overhead neon or fluorescent shop lights cast harsh shadows, wash out colors, and increase the glare on the skin.
The Fix: If you can, move to a window. Indirect natural daylight is the absolute best light for showing off ink. If it's dark outside, turn off the overhead lights and use a polarized ring light or a softbox directed at a 45-degree angle to the tattoo, rather than straight-on.
2. Manage the Glare (The Anti-Wipe Hack)
Fresh tattoos are wet. Ointment, plasma, and green soap make the skin highly reflective, causing massive glare spikes in photos.
The Fix: Wait about 5-10 minutes after the tattoo is finished before shooting. Give the skin a gentle, dry paper towel dab (never wipe) just before snapping the picture. Pro Artist trick: Some artists use a polarized lens filter clipped onto their phone to instantly cut glare from the skin.
3. Lock Focus and Drop the Exposure
Smartphones automatically try to over-expose photos to make them "brighter." On inflamed skin, this makes everything look aggressively red and washes out the nuances of the ink.
The Fix:
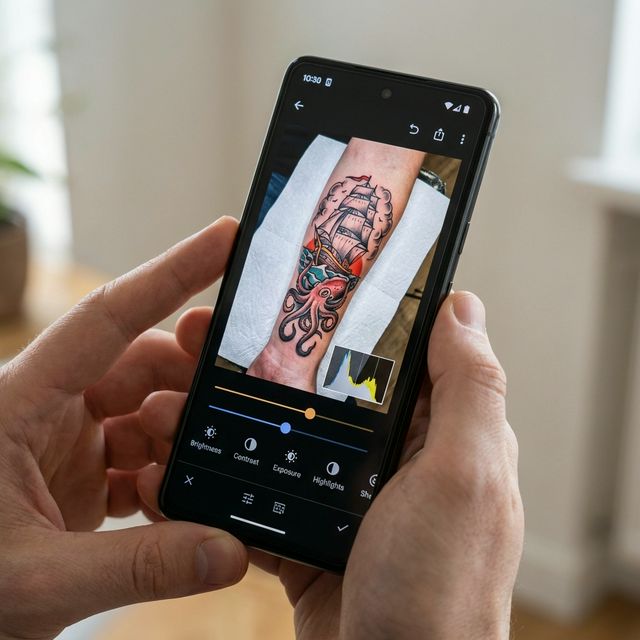
Tap on the darkest part of the tattoo on your screen to lock the focus. Then, use the little sun slider next to the focus box to manually drag the exposure down by about 20-30%. By darkening the image slightly, you eliminate the "washed-out" look, making the blacks look rich and bringing out the true saturation of the colors.
4. The Magic of the CPL Filter
If you are a working artist, spending $20 on a Circular Polarizing (CPL) phone clip lens is the highest ROI investment you can make for your marketing.
When combined with a polarized light source, a CPL filter allows you to dial out ALL glare from the skin. It makes a wet, fresh tattoo look like it was printed directly onto matte paper. This is the secret behind those impossibly flawless tattoo photos you see from top artists on Tattit and Instagram.
5. Subtle Edits Only
Editing a tattoo photo should only be done to represent the tattoo more accurately, not to deceive.
- Do: Slightly reduce the "red/warmth" saturation to counteract the camera picking up too much blood flow.
- Do: Adjust contrast so the darkest blacks in the photo match the darkest blacks in real life.
- Don't: Aggressively sharpen the image or paint over actual skin texture. Clients can tell when a photo looks like plastic.
Take your time finding the right angle and light. Your portfolio (and your Instagram grid) will thank you!
Frequently Asked Questions About Tattoo Photography
What is the best phone for tattoo photos? While any modern flagship smartphone (iPhone Pro, Samsung Galaxy S series, Google Pixel) has incredible sensors, the iPhone Pro lineup is widely favored in the industry for its consistent color science and easy CPL filter integrations.
Why does my tattoo look so red in photos? Smartphones often auto-correct for "skin tones" by boosting warmth and saturation. Combined with actual skin inflammation, this results in an overly red photo. Manually lowering exposure and slightly desaturating the photo can correct this.


